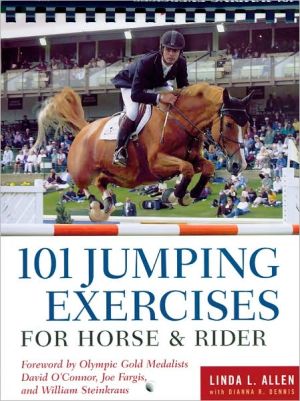
101 Jumping Exercises for Horse and Rider
Linda Allen has spent more than 35 years in the equestrian industry, training, riding, jumping, competing, and designing courses. In 101 JUMPING EXERCISES FOR HORSE & RIDER, she provides a logical and consistent series of exercises presented in a fun and appealing way, with clear arena maps and straightforward instructions. For each exercise, Linda covers set-up; how to ride the exercise; steps to make the exercise more difficult; what every successful rider should keep in mind while...
Search in google:
Linda Allen has spent more than 35 years in the equestrian industry, training, riding, jumping, competing, and designing courses. In 101 JUMPING EXERCISES FOR HORSE & RIDER, she provides a logical and consistent series of exercises presented in a fun and appealing way, with clear arena maps and straightforward instructions. For each exercise, Linda covers set-up; how to ride the exercise; steps to make the exercise more difficult; what every successful rider should keep in mind while working; when to move on to the next step; and the benefits of the exercise. This must-have workbook, a sequel to the successful "read-and-ride" 101 Arena Exercises and 101 Horsemanship & Equitation Patterns, stresses safety, skill building, and success for riders of all ages and levels of experience, whether their interest is in show jumping, eventing, hunters, equitation, or just plain having fun with their horses. Designed in the same user-friendly format as the previous books, with a lay-flat comb binding, the book can be hung on the barn wall or draped over a jump standard in the training area so the reader/rider can refer to it from the saddle.
\ Introduction\ Riding and jumping, like most other activities, are best learned by doing. Practice is as essential for riders as ongoing training is for horses, no matter their current level. The old adage "Practice makes perfect" works best when modified to say: "Perfect practice makes perfect."\ Getting Started\ This book is for riders and instructors alike. The exercises are fairly straightforward and can be used by horses and riders at every level of experience. Keep in mind that even the easiest exercise can be difficult to ride perfectly!\ These exercises are designed to be used by:\ - Pleasure riders who are simply looking for new ways to enjoy their horses. The ground pole exercises, even without any jumping, improve accuracy, security, balance, and control, while offering an easy and fun new aspect to riding in the arena.\ - Riders who are totally new to jumping, feel the urge to try it, and wish to do so in a way that is simple, safe, sensible, and fun.\ - Novice, intermediate or advanced riders looking for an effective way to improve their basics, correct their weaknesses, or brush up their technique.\ - Instructors seeking a variety of ways to help their students learn and have fun in the process.\ - Trainers looking for a step-by-step system to introduce jumping to the horse and ideas for overcoming some of the challenges faced with horses at every stage of training.\ - Experienced competition riders eager for a fresh perspective on achieving and maintaining the competitive edge of horse and rider alike.\ The majority of these exercises are rider exercises. To be done correctly, they require that the rider be totally focused and aware of each and every step taken by the horse. They also require, and thus teach, the important skills of keeping your mind focused ahead of your horse; your movements quiet, controlled, and ever so slightly behind those of your horse; and your balance perfectly in sync with your horse.\ Every one of these exercises emphasizes the dialog between rider and horse. They teach your horse proper balance and technique, making jumping easier so he will jump confidently at the upper limits of his natural abilities. The skills learned through these exercises will leave your horse adept at making any necessary adjustments to avoid bumping the poles and will encourage him to maintain a proper bascule (arc) over every jump. The gymnastic exercises (#26 through 40) in particular will also teach him to think for himself. All the exercises offer you, the rider, the opportunity to perfect your quiet, steady, and consistent aids, so your horse willingly listens to your requests and responds instantly.\ Some of the later exercises tackle specific trouble spots encountered in training or correct particular shortcomings in a horse's jumping technique.\ The real secret to improvement through these exercises lies in the way you ride them. By paying attention to the smallest details throughout each exercise, you will become an aware rider -- one who feels what is happening at every moment and knows when and how to respond. Your training goal should be consistent and polished performances, with an attentive, confident, and happy horse.\ Why Not Use Complete Courses for Practice at Home?\ Courses ask questions. The more questions asked, the more difficult the questions, and the more quickly the questions are presented, the tougher a given course will be to execute faultlessly. The answers to virtually every kind of question asked in competition are contained in this series of exercises.\ Just as in other learned activities (physical and cerebral), progression from novice to skillful rider is accomplished by understanding the questions and learning how to find the answers. Skill is your ability to answer questions correctly, consistently, and confidently -- first simple questions one at a time, and then more and more complex ones, until even a complicated series in rapid sequence is within your capacity.\ Exercises, first short and simple, then increasingly longer and more complex, allow you and your horse to focus on particular aspects of the whole. Practice until correct and effective execution of the basics becomes habit for you both. It is impossible to focus fully on multiple simultaneous tasks; some things must become so automatic that they are always a part of everything you do.\ For jumping, two habits are essential to good results:\ 1. Basics: Secure position and balance must be automatic.\ 2. Focus: A conscious awareness of where you are, where you are going, and what is necessary to get you there must be your top priority every moment you are on course.\ Keep It Simple!\ Whether you are a beginner at jumping, an experienced rider with a green horse, or a World Champion/Gold Medallist, success depends on solid, no-frills basics!\ Straightness Balance Rhythm Impulsion\ These four qualities apply just as much to rider as to horse. A crooked or out-of-balance rider cannot produce a straight and balanced horse. A rider unable to "hold the rhythm in her head" while riding is unlikely to produce consistent, smooth rounds. Impulsion is a forward quality the horse displays; creating it (or tempering it in a hot, nervous, or overly sensitive horse) is high on the rider's to-do list.\ The early exercises look very simple. They can be more difficult to ride than you think. They hold the key to all jumping, if you take care to do them correctly. Perfectionism is a good trait when it is applied at the right time, and that is at the beginning, while you are working on the easiest portions. If you develop the habit of noticing every tiny detail in your execution of these basic exercises, you will have taken a giant step toward your goal.\ Having a Problem?\ Every rider and horse finds some things more difficult than others. Even the most experienced make errors and encounter problems. When faced with a problem, you first need to ask yourself, "What exactly happened?" It is important to be specific in your answer: "Refusal" doesn't say much about the way the jump didn't get jumped!\ Then, "Why did it happen?" First, determine a single primary cause. For example, a refusal in the form of a run-out is a steering problem first and foremost.\ Finally, "How can I change my ride to correct that cause of the problem?" Here, keeping it simple is essential; plan in advance the simplest way to fix the single most likely reason that things went wrong.\ In our run-out example, getting busy with your stick and spurs is useless for a steering problem. Concentrate on riding your approach so straight that your horse can't even consider going past the jump. If steering remains a problem, then you must return with renewed determination to the specific exercises that emphasize straightness.\ Safety First\ Minimizing risk is essential in any training program! Following a few simple rules can prevent most mishaps and mitigate the result should the unexpected happen.\ First, always use proper equipment:\ ASTM-SEI approved safety helmets should be standard attire for all riders with good heads on their shoulders! When buying your helmet, always check the label, and take the trouble to find a good fit. Always replace your helmet whenever it receives a substantial blow. Safety helmets are designed like the bumpers on today's cars; they are effective because they work by crumpling on impact. Shoes with heels are crucial because the heel keeps your foot from getting caught in the stirrup in the event of a fall.\ Body protectors are now required to compete in Eventing as well as racing and could be an excellent addition to your safety gear when training. They can save your ribs and internal organs as well as your wind in case of a fall.\ Second, always jump with someone in close proximity. As a matter of fact, even without jumping, it is wise to plan always to ride when someone is nearby. Accidents are rare but can happen just as easily over a cross rail or when trotting around on the flat as over a 5-foot oxer. Why take the chance of a simple accident becoming a life-changing event?\ Using a Trainer, Coach, Instructor, Ground Person, or Helper\ It is far easier to progress with some help from the ground, in addition to being safer. A knowledgeable trainer or coach can simplify many things for you. When that is just not an option, however, you can still make good progress without a professional. Turn a helper into a "ground person."\ Your helper can be anyone willing to be a part of your training program -- friend, sibling, spouse, parent, or another rider who is willing to trade their help for yours when they ride. While knowledge of horses is an advantage, even someone entirely new to the sport can quickly become a very helpful "pair of eyes" (and hands), sharing observations, videotaping, and even (especially!) learning to build the jumps. Having someone who can make the changes necessary to build the various exercises -- add jumps, change heights, spreads and distances -- means you do not have to interrupt your training to dismount and do it yourself. Make your helper part of the process. You will both have fun and progress faster.\ Your Arena, Jumps, and Other Equipment\ These exercises can be built in a variety of settings, although a level area of a moderate size makes setting up and riding them easier. Less experienced riders should jump in an area enclosed by a fence.\ A workable size for an outdoor jumping arena can range from 100 to 200 feet (30 to 60m) wide, with a length of 200 to 300 feet (60 to 100m). While a small arena may limit the complexity of the gymnastics you can set, many valuable patterns can be used in even the smallest space.\ The surface should be even, provide some "cushion," and be neither slippery nor excessively deep.\ Take the time to inspect your arena and equipment for rocks, protruding nails, large splinters, or any piece of equipment that a horse could put his foot through. Do not allow extra jump cups or pins to remain lying on the ground or empty on the standards. Horses or riders can get hurt by stepping on or bumping them. Why miss riding time with an avoidable bruise or cut?\ Poles\ All of the exercises make extensive use of poles. The best poles are between 3 and 4 inches (approx. 10cm) in diameter, 10 or 12 feet (3 or 4m) in length, and "machined" to a round shape. Almost every area has a lumber supplier that can obtain poles of this description. Octagonal poles, made from 4x4s, are a far less satisfactory substitute for machined versions, since the original lumber seldom has a straight enough grain to prevent frequent breakage.\ Shorter poles are lighter to handle and fit more easily in small or indoor arenas. They require greater accuracy when riding the more complex exercises. Many top riders use shorter poles and simple stick standards (ones without wings) by choice when training -- which makes the wider fences encountered in competition seem easier.\ Cavalletti (poles raised from 2 to 10 inches (5 to 25 cm) off the ground) are desirable under certain circumstances. They require a horse to use himself: that is, to round his back and bend his joints to a far greater degree than does a simple pole on the ground. If your aim is increased fitness, power, and concentration from your horse, it is worth the effort to raise the ground poles once you and your horse are comfortable riding an exercise with the poles on the ground.\ A flat plank or a raised, semi-fixed cavalletti is a good replacement for a loose ground pole whenever a placing pole is called for immediately on the landing side of a jump.\ Permanent trot cavallettis consisting of railroad ties or other heavy timber are wonderful to have if you have the space for them. Set four to six railroad ties evenly spaced for trot work, in a location to be approached from either direction. A spacing of 4 ft., 6 in. to 4 ft., 9 in. (1.4 to 1.5m) will be ideal for most horses.\ While PVC poles are not the best for jumping, 4-inch plastic drain pipe (the non-shattering type) can be useful to have on hand for "guide" poles to keep your horse straight. In addition to being inexpensive, they are very light and easy to move. They can also serve as ground poles, but sensitive (hotter) horses tend to become upset over the sound and movement when PVC poles are bumped.\ Other Jump Equipment\ Plastic pylons are useful for marking turning points or delineating the various patterns. If orange cones (similar to those used in areas of road construction) are not readily available, plastic water buckets or some of your extra blocks can work just as well.\ Simple, easy-to-modify equipment is best when constructing these exercises. A useful inventory includes an assortment of good jump poles (minimum of 12 rails, preferably closer to 50), 10 or 12 blocks (available either commercially or home-made from short, notched sections of 6x8-inch (15.2 x 20.3m) wood, which can be used to raise your poles when desired), and at least 10 (preferably 30 or 40) upright or wing standards.\ Bits, Martingales, and Other Equipment\ When it comes to bits, less is best. Spend time educating your horse; it is the only way to achieve lasting results.\ While there can be good reasons for using special bits in competition, the least severe bit possible should be used while schooling. A plain snaffle is always the first choice, whether it be a medium thickness, hollow, rubber, or Bristol mouthpiece; full-cheek, round-ring, or D-ring. This type of training is meant to focus your horse's attention on your commands -- a sharp bit will only discourage the kind of cooperation you want.\ Martingales are optional. For a young horse with a tendency to toss his head up when playing, using a medium-length standing martingale might be a good idea. Running martingales are seldom needed when schooling simple exercises, although they might be helpful when jumping longer courses.\ Draw reins for jumping, except in the hands of some exceptionally talented professional riders, are likely to compound problems rather than correct them. Although they can be useful for flatwork, they shouldn't be used for jumping unless you are under the supervision of an experienced trainer.\ Boots or polo wraps, while optional, can prevent a slip during a turn or other misstep from resulting in a scratch or bruise.\ How Is Your Position?\ When it comes to position, "Beauty is as beauty does." Achieving solid and effective basics is the only way for both you and your horse to perform your best.\ Often, flaws in position are overlooked until problems arise in a later stage of training. If your leg slips back, you could jump a simple cross bar , but over a bigger oxer, that slipped leg will leave you downright insecure. Your loose leg may be okay all summer on your quiet horse, but then one chilly fall morning, a playful buck at a critical moment might put you on the ground.\ Use the exercises throughout this book to help figure out what you're doing right and what you're doing wrong. The basic ones provide the opportunity to fix weaknesses in your position. Ignore position or allow bad habits to persist, and your results will suffer over complete courses or higher jumps.\ Position consists of the following three essentials:\ Secure. This means being able to stay in the center of your horse, hands independent and body balanced, with a solid leg and base, and sufficient, relaxed flexibility to remain centered in your tack, even when your horse makes an unexpected move.\ Effective. The position and use of your legs, seat, upper body, arms, and hands should create the partnership with your horse that produces consistent good performances. Especially when jumping, "getting the job done" is much more than just looking pretty!\ Adaptable. An effective position permits a light seat, a two-point (or galloping) position, or a deeper, full seat. Jumping courses can require a rider to utilize each of these, depending on the particular task at hand. The ability to move easily and naturally among the various seats, along with an understanding of when each is appropriate, is essential.\ Key to a good position is a solid leg. The better your leg, the better your balance, and the more effective you will be over jumps. If you encounter problems, keep in mind that difficulties with your upper body are almost always a reflection of an incorrect or inconsistent leg position. Always remember: "Fix the leg first."\ The most serious faults in leg position are:\ - A thigh rotated out, placing the back of the knee in contact with the saddle;\ - A braced knee, creating stiffness and rigidity in the other joints as well;\ - A pinched knee, creating a "pivoting" lower leg and preventing the consistent, even contact from thigh down to mid-calf that is most effective; Bracing the toe or ball of the foot against the stirrup rather than allowing the weight to flow through the stirrup into a deep and flexed heel. This deep heel provides the low balance point that is the mark of most successful jumping riders.\ Three Basic Seats\ Depending on the objective, riding over jumps requires three basic seats, referred to in this text as: full-seat, light seat, and two-point (which you will sometimes hear described as galloping position or half-seat).\ Light seat. This is the basic and most frequently used position for jumping. Your weight is distributed primarily into your leg, sinking through supple hips, knees, and ankles, into your heel, while your seat (the front portion of your "seat bones," actually) maintains a light contact with the saddle. This position is appropriate for most schooling throughout the exercises in this book. A correct light seat with a medium stirrup length allows you to transition into a two-point or full-seat instantly and naturally any time these might be required.\ Full-seat. Here the weight of your upper body is supported in the saddle through a supple yet straight and nearly vertical back. This position is seldom used when actually jumping. Its primary use is during those infrequent moments when every driving aid is essential, or when your horse needs the balance it can provide, around a slippery corner, for example. The ultimate use of the full-seat is in pure dressage. The longer stirrup length and vertical upper body positioned directly over your seat bones, necessary for a full-seat, are a hindrance when you must also accommodate the jumping efforts of your horse.\ Two-point, half-seat, or galloping position. This position puts 100 percent of your weight into your leg, permitting you to keep your seat entirely clear of the saddle. It is used when your horse will benefit from total non-interference from your seat. It is also an excellent exercise for strengthening your leg. Most riders find that Show Jumping over larger fences requires a somewhat shorter stirrup length than they use for flat work and schooling over lower jumps. The most extreme example of short stirrup length is used by flat-racing jockeys, followed by steeplechase jockeys. Eventers on their Cross-country courses usually ride medium short. Determining your own most suitable medium stirrup length will depend on your body type and degree of flexibility, coupled with the size and shape of your horse. Adjust to find a length that will permit you to sit and ride in a position as close to that shown in the illustration as possible.\ The ability to use the aids independently and appropriately is critical to being an effective jumping rider. A rider who makes a habit of "clashing her aids" (kicking while tugging on the reins, for example) makes life miserable for the horse. Clashing aids will create a horse that refuses frequently or becomes hot and bothered by the very idea of jumping.\ Fix any of the above problems before you tackle a "real" jump. The early exercises provide an effective and fun way to monitor your progress as you strengthen your position.\ Using this Book\ Terms and Format\ Most of the terms used here are explained throughout the text. Specific ones requiring basic definition are found in the Glossary. When listed terms first appear in the text they are indicated in bold.\ You will find directions for setting up and riding each exercise, as well as Hints, Problem-solving, Reminders, and "Doublecheck," which includes questions to ask yourself about your riding. Critical information and concepts are boxed. Each exercise includes a setup diagram.\ Setting Up the Exercises\ This book is intended to meet the needs of a wide variety of horses and riders. Thus, it is inappropriate to specify one "correct" height or exact distance for many of the exercises. Following are some general guidelines.\ Jump Dimensions\ As you determine the height and width of jumps, keep in mind the present level of training and experience of both you and your horse. Throughout this book, the text will describe the appropriate size for the obstacles as "small," "moderate," or "challenging."\ You may interpret these terms as follows:\ "Small" is an obstacle that neither you nor your horse considers particularly difficult to manage, even under new circumstances or if you make a mistake in your approach or take-off. Generally, this will be in the range of 2 to 3 ft. in height (60 to 90cm). If you are very new to jumping, the jumps can be even lower. Top riders recognize that they can accomplish valuable training over very small jumps when used correctly. The bonus is the negligible physical toll these small obstacles take on your horse. This allows you to use extensive repetition -- the most effective educational tool with horses -- to create good habits without injury or undue stress.\ "Moderate" indicates an obstacle constructed to somewhat larger dimensions. You should be totally comfortable jumping these obstacles, but they should be large enough to command your full attention.\ "Challenging" is used in places where you should raise your sights a bit, proving to your horse and yourself that the size of the jump is but one factor in a complex equation.\ According to master horseman and jumping rider Gene Lewis, "If you always ride to small jumps as though they were large, you will not have to change a thing when the height goes up."\ Distances\ The distance between any two obstacles is always measured according to the inner measurement between the jumps (from the back of the first obstacle to the front of the next). Disregard the position of ground lines for purposes of this measurement.\ Since one rider might be training a small pony and another a 17+2-hand ex-racehorse, you should be prepared to take the "average" distances indicated and adjust them somewhat. The important thing is to produce the result that is described with your horse or pony. As you proceed into the exercises, you will find discussions of various distance issues, such as how to evaluate your particular horse's stride, and how your gait approaching a jump or the shape of the jumps affects the way you ride them. Adapt the range of distances indicated to suit your own horse's abilities and current level of training.\ Cross Poles (Cross Bars)\ Construct cross poles so as to leave approximately 4 in. (10cm) between the two poles where they cross. This prevents the front pole from jamming against the back pole should a horse make a mistake and hit the jump solidly.\ Width\ The width of spread jumps is measured "outside to outside" of the top poles. See diagram.\ Ground Lines\ Ground lines for the jumps are generally advisable when constructing these exercises. They encourage less experienced horses to jump in better form and help mitigate rider error. A pole or small flower box placed under or in front of your jump's front pole creates a nice ground line for training purposes. When placed in front, it is generally best to keep the distance between 6 and 20in. (15 to 50cm). Some exceptions to this general rule-of-thumb are specifically mentioned, especially in the Challenges section.\ Extra Poles\ The addition of a second pole below the top one for vertical jumps (or for the front element of oxers) is recommended when the jump is higher than about 3 ft. (90cm). This becomes essential, for safety reasons, when the height exceeds 4 ft., 3 in. (1.3m). Avoid placing extra poles under the top pole on the back of an oxer unless the exercise calls for jumping the spread in both directions. In those cases, always leave a gap between the top pole and the pole below it of 12 in. (30cm), and avoid ground lines that are more than 6 in. (15cm) out from the jump on either side.\ Safety Cups\ Use FEI-certified safety cups to hold the back element of any spread jump when training. In the absence of safety cups, use the shallowest (nearly flat) jump cups available. A back rail set too snugly in cups can inflict punishment on tender equine shins for even a slight misjudgment on your horse's part and could result in loss of balance or even a fall. If shallow or safety cups are not available, have your helper place one end of the back pole on the back "lip" of the cup. (See illustration "Lipping the cup" on page XX). Far better to ask your helper to pick up the pole occasionally than to have you or your horse suffer an avoidable accident.\ Introduction to Exercises\ The exercises are divided into Ground Poles, Trot Gymnastics, Canter Exercises, Challenges, and Advanced Exercises. Designed to improve your position and effectiveness as a rider, the series will lead your horse through a sensible training progression -- whether he is beginning his career or is already an experienced campaigner.\ The first group of exercises, using only simple ground poles, is valuable for both horse and rider even when one of them is at the earliest stage of training. Effectively supplementing your horse's training on the flat, these exercises will ensure that everything your horse has learned in a non-jumping environment will remain uncompromised when jumping enters the equation. They also make a lesson or training session interesting and provide an ongoing "status report" of your progress.\ The trot gymnastics are the best way to introduce a horse or rider to jumping. They are equally valuable for continuing to refine the technique of experienced horses, riders, and horse/rider combinations.\ Simple canter exercises lead to more complex jumping from the canter. The entire canter series provides an excellent framework for practicing the questions that will be asked on courses in competition. Only the most experienced horses and riders should move directly to the more demanding exercises. Be sure your basic skills are in place!\ The final Challenge section specifically addresses various training issues that you may face. The last five exercises ask advanced questions of even the most experienced horse and rider.\ Various "Guest Exercises" contributed by world-famous riders and trainers are also included throughout the book.
Foreword (ix) Introduction (1) 1. Basic Exercises from the Walk and Trot (Exercises 1-25) (14) 2. Turning Pole into Jumps: Gymnastics (Exercises 26-40) (66) 3. Gymnastics with Varying Strides (Exercises 41-49) (98) 4. Using Gymnastics for Both Turns and Straightness (Exercises 50-53) (112) 5. Canter Exercises: Poles (Exercises 54-64) (122) 6. Canter Exercises: Jumps (Exercises 65-73) (146) 7. Encountering Challenges (Exercises 74-95) (166) 8. Exercises for the Most Advanced Horses and Riders (Exercises 96-101) (196) Appendix (208) Index (220)


