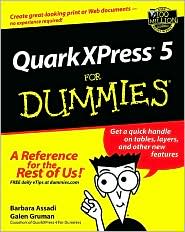
QuarkXPress5 For Dummies
Pick up the fundamentals necessary to create extraordinary documents with QuarkXPress 5. QuarkXPress 5 For Dummies will get you up to speed and designing quickly with this powerfuldesktop publishing program.
Search in google:
Create great-looking print or Web documents -no experience required!Get a quick handle on tables, layers, and other new featuresA Reference for the Rest of Us!(r)Covers both Mac and PC program versionsGet up and running fast with Quark's cutting-edge desktop publishing and Web toolsThe latest version of QuarkXPress is packed with new creative tools and Web capabilities. But where do you begin? This fun and easy reference shows you the way, covering everything from layout and text-editing basics to book building, color management, special effects, Web publishing, and more.The Dummies Way* Explanations in plain English* "Get in, get out" information* Icons and other navigational aids* Tear-out cheat sheet* Top ten lists* A dash of humor and funGet Smart@ www.dummies.com* Find listings of all our books* Create your own personalized book with Hungry Minds a la Carte(TM)* Sign up for daily eTips at www.dummiesdaily.com
QuarkXPress5 For Dummies\ \ By Barbara Assadi Galen Gruman \ John Wiley & Sons\ ISBN: 0-7645-0643-9 \ \ \ Chapter One\ Introducing QuarkXPress\ In This Chapter\ * Getting familiar with menus, dialog boxes, and keyboard shortcuts\ * Exploring QuarkXPress's Tool palette and Measurements palette\ When the first personal computer shipped in the early 1980s, a quiet revolution began. The turning point in that revolution was the introduction of desktop publishing in the mid-1980s, which let anyone anywhere become a publisher. Soon, anyone with a message could get it out to the world. That revolutionized much of business and society. You, too, are a revolutionary. And by buying QuarkXPress and this book, you have taken up the cause.\ Over the years, QuarkXPress has become the best desktop publishing tool around. Professionals know that, which is why they have made QuarkXPress the corporate standard for magazine, newspaper, and catalog publishing. It is also an effective book-publishing tool, thanks to its capability of index documents and creating tables of contents and multichapter books. Now the folks at Quark have upped the ante again with the release of QuarkXPress 5. In addition to hosting a boatload of new desktop-publishing features (including the long delayed, though very welcome inclusion of a table-making tool), 5 boasts an entire suite of publishing tools for the World Wide Web, including tools for creating forms, radio buttons, hyperlinks and "hot spots." In short, ifever you wanted to limit your publishing options to just one or two applications, you certainly can't go wrong choosing QuarkXPress 5 to be among them.\ You may feel a little daunted by QuarkXPress. Relax. Throughout this book, we walk you through the program to familiarize you with all it has to offer. You may be a bit intimidated by the vast layers of panes, palettes, tools, and menus you see before you. Don't be. Working with QuarkXPress is like working with a new person at the office - things may be awkward at first, but after you get to know each other, you find you can do great things together.\ A Familiar Interface\ First, you'll no doubt notice that the QuarkXPress interface bears a strong resemblance to the features used by other Windows and Macintosh programs. If you use other programs, you already know how to use QuarkXPress components such as file folders, document icons, and the set of menus at the top of the document window.\ You create a document by choosing File[right arrow] New[right arrow] Document or open an existing document by choosing File[right arrow] Open[right arrow] Document. The program displays a window similar to the ones shown in Figure 1-1.\ This book is for both Windows and Macintosh users. We use both Windows and Mac screen shots throughout the book - unless the two platforms' versions of QuarkXPress have significant differences. In those cases we show screens from both.\ When you display a document in either Windows or Macintosh, you'll notice a few visual elements:\ \ The ruler origin box lets you reset and reposition the ruler origin, which is the point at which the side and top rulers are 0 (zero).\ \ \ The name of the open document appears on the title bar, located below the menu bar on the Mac and above the menu bar in Windows. You can move the document window around in the screen display area by clicking and dragging the title bar.\ \ \ If you have reduced or enlarged a document, clicking the zoom box on the Mac or the restore box in Windows, at the top right corner of the document window, returns it to its previous size.\ \ \ You can make a document all but disappear by minimizing it (in Windows) or turning it into a window shade (on the Mac). To minimize a document, click the minimize box in the document's title bar. To make a document into a window shade, double-click its title bar or click its WindowShade box on the Mac.\ \ \ The vertical and horizontal rulers on the left and top of the window reflect the measurement system currently in use.\ The pasteboard is a work area around the document page. You can temporarily store text boxes, picture boxes, or lines on the pasteboard. Items on the pasteboard do not print.\ \ \ QuarkXPress displays a shadow effect around the document page. The shadow indicates the edges of the document.\ \ \ If you select Automatic Text Box in the New dialog box (which you access by selecting New Document from the File menu), a text box appears on the first page of the new document.\ \ \ Clicking and dragging the size box on the Mac resizes the document window as you move the mouse. In Windows, you can drag any side of the window to resize it.\ \ \ The View Percent field shows the magnification level of the page that's currently displayed. To change the magnification level, enter a value between 10 and 800 percent in the field; then press the Return key or click elsewhere on the screen. Press Control+V on the Mac or Ctrl+Alt+V in Windows to highlight the View Percent field.\ \ \ Switch pages using the page pop-up.\ \ \ Use the scroll bars, boxes, and arrows to shift the document page around within the document window. If you hold down the Option or Alt key while you drag the scroll box, the view of the document is refreshed as it "moves."\ \ \ Close a document by clicking its close box. On the Mac, you can also use the shortcut *+W; in Windows, use Alt+F4.\ \ Menus\ The menu bar appears across the top of the document window. To display a menu on a Mac, click the menu title and, if you're using an older version of operating software, hold down the mouse button. (In Windows or Mac OS 9 or later, just click the menu title; you don't need to hold down the mouse button.)\ From the menu, you can select any of the active menu commands. QuarkXPress displays inactive menu commands with dimmed (grayed-out) letters. When commands are dimmed, it means that these commands are not currently available to you - they're inactive.\ To select one of the active menu commands, hold down the mouse button as you slide through the menu selections. (As you get used to the program, you can avoid using menus by using the keyboard equivalents for menu selections instead. Keyboard equivalents are displayed to the right of the command names in the menu.)\ If an arrow appears to the right of a menu command, QuarkXPress displays a second, associated menu when you choose that command. Sometimes this secondary menu appears automatically when you highlight the first menu command; other times, you must continue to hold down the mouse and slide it to the submenu name in order to activate the menu. This may sound a little confusing on paper. But go ahead and try it. You'll find it's no big deal. (Again, in Windows or Mac OS 9 or later, you don't need to hold down the mouse button; just click the arrow to make the submenu appear.) Figure 1-2 shows the Style menu and the secondary menu that appears when you select the Font menu command.\ Dialog boxes\ Some menu commands are followed by a series of dots called an ellipsis (...). If you choose a menu command whose name is followed by an ellipsis, a dialog box appears. Figure 1-3 shows a dialog box. Dialog boxes give you a great deal of control over how QuarkXPress applies specific features or functions to your document.\ Some dialog boxes also contain submenus. If a menu has a submenu associated with it, an arrowhead appears to the right of the menu entry. In addition to submenus, QuarkXPress includes several pop-up menus, which appear when you make certain selections in a dialog box. Figure 1-3 shows a pop-up menu for text justification.\ QuarkXPress uses tabs, a semi-new kind of dialog box that merges several dialog boxes into one. In fact, you'll often see six or seven of these tabs - similar to what you see on a file folder in an office cabinet - in a single dialog box. Like the file folders in an office cabinet, these tabs keep a large amount of stuff organized in one tidy spot. Click the tab, and it comes to the forefront, showing you the options for that tab (refer to Figure 1-3). You simply work with each tab you want within the dialog box.\ Keyboard shortcuts\ You can select some QuarkXPress functions through pull-down menus, some through palettes, some through keyboard shortcuts, and some through all three options. Most new users begin by using menus because menus are so readily available and familiar. But as you become more comfortable using the program, you may want to save time by using the other options as well, particularly the keyboard shortcuts.\ Suppose that you want to move from page one of a document to page three. You can change pages by choosing Go To from the Page menu, or you can use the keyboard shortcut: Press and hold the Command key (*) or Ctrl key while you press the J key. In this book, we write this key combination as follows: *+J (Macintosh shortcut) or Ctrl+J (Windows shortcut). The Macintosh shortcut appears first, followed by the Windows shortcut. If the two platforms use the same shortcut, we list the shortcut just once.\ In most cases, the Mac's * key and the Windows Ctrl key are the same, as are the Mac's Option key and the Windows Alt key. Shift is the same on both, whereas the Control key exists only on the Mac and has no Windows equivalent. On both platforms, the Return key is the same as the Enter key (some keyboards use one word whereas some keyboards use the other); in neither case do we mean the Enter key that appears on the keyboard's numeric keypad at the far right of the keyboard. (To avoid confusion, we say "Return" for the key that inserts a new paragraph or activates a command, and we say "keypad Enter" when we mean the key on the numeric keypad.)\ The Tool and Measurement Palettes\ One of the coolest features of the QuarkXPress interface is its palettes, which let you perform a wide range of functions on an open document without having to access pull-down menus. Like context menus and keyboard shortcuts, palettes are huge time-savers, and you'll undoubtedly find yourself using them all the time. Without a doubt, the Tool palette (see Figure 1-4) and the Measurements palette are the most commonly used. In fact, you'll probably keep these two palettes open all the time. You can find both palettes by choosing View[right arrow]Tools[right arrow]Show Tools, and View[right arrow]Show Measurements. The following list describes the contents of the two palettes.\ To use a tool on the palette, you first need to activate the tool. To activate a tool, just click it. Depending on which tool you select, the cursor takes on a different look to reflect the function the tool performs (see "A Myriad of Mouse Pointers" later in this chapter). When you click the Linking tool, for example, the cursor looks like links in a chain.\ Throughout the book, we explain in greater detail many of the functions you can perform with the Tool palette. But, for now, the following sections give brief descriptions of each tool.\ Item tool\ The Item tool controls the size and positioning of items. In other words, when you want to change the shape, location, or presence of a text box, picture box, or line, you use the Item tool. We discuss text boxes, picture boxes, etc. in detail later in this book. For now, just keep in mind that the Item tool lets you select, move, group, ungroup, cut, copy and paste text boxes, picture boxes, lines and groups. When you click the Item tool on a box, the box becomes active, which means that you can change or move the box. Sizing handles appear on the sides of the active box; you can click and drag these handles to make the box a different size.\ Content tool\ The Content tool controls the internal aspects of items on a page. Functions that you can perform with the Content tool include importing (putting text into a text box, or putting a picture into a picture box), cutting, copying, pasting, and editing text.\ To edit text in a text box, select the Content tool. Then select the areas of text you want to edit by clicking and dragging the Content tool to highlight the text or by using different numbers of mouse button clicks, as follows:\ \ To position the cursor: Use the mouse to move the I-beam pointer (it looks like a large capital I) to the desired location and click the mouse button once.\ \ \ To select a single word: Use the mouse to move the pointer within the word and click the mouse button twice.\ \ \ To select a line of text: Use the mouse to move the pointer within the line and click the mouse button three times.\ \ \ To select an entire paragraph: Use the mouse to move the pointer within the paragraph and click the mouse button four times.\ \ \ To select the entire document: Use the mouse to move the cursor anywhere within the document and click the mouse button five times.\ \ When the Content tool cursor changes to a hand shape, you can use the tool to move the contents of the picture box around the inside the picture box. You can also use it to manipulate the picture's contents, such as applying shades, colors, or printing effects. Again, we discuss the in and outs of text boxes and picture boxes in more detail later in this book. For now, just keep in mind the Content - and the aforementioned Item tool - go hand-in-hand with these boxes.\ Rotation tool\ Use the Rotation tool to rotate items on a page. You can click a text box, picture box or line, and rotate it by dragging it to the angle you want. You also can rotate items on a page in other ways, which include using the Measurements palette and the Modify command in the Item menu.\ Zoom tool\ You may want to change the magnification of a page on-screen. For example, you may be making copy edits on text that is set in 8-point type; increasing the displayed size of the text makes it easier to see what you are doing as you edit. The Zoom tool lets you reduce or enlarge the view you see in the document window. When you select the Zoom tool, the cursor looks like a small magnifying glass; when you hold the cursor over the document window and click the mouse button, QuarkXPress increases or decreases the magnification of that section of the screen in increments of 25 percent. (To increase magnification, choose the Zoom tool and click on your document. To decrease magnification, choose the Zoom tool, hold the Option or Alt key, and click on your document.)\ \ Continues...\ \ \ \ Excerpted from QuarkXPress5 For Dummies by Barbara Assadi Galen Gruman Excerpted by permission.\ All rights reserved. No part of this excerpt may be reproduced or reprinted without permission in writing from the publisher.\ Excerpts are provided by Dial-A-Book Inc. solely for the personal use of visitors to this web site. \ \
Introduction1Pt. 1Getting Started7Ch. 1Introducing QuarkXPress9Ch. 2Have It Your Way25Ch. 3Boxes and Text Unite!37Ch. 4A Picture Is Worth57Ch. 5Getting Tricky with Boxes71Pt. IIAdding Style and Substance83Ch. 6You've Got Real Style85Ch. 7Working with Special Characters109Ch. 8Devil in the Details133Ch. 9A Touch of Color159Ch. 10Your Survival Guide to XTensions and Required Components179Ch. 11Printing to Pages189Pt. IIIThe Picasso Factor213Ch. 12Using QuarkXPress as an Illustration Tool215Ch. 13Other Controls for Item Management231Ch. 14Warped Images243Ch. 15Text as Art255Pt. IVGoing Long and Linking265Ch. 16Building Books267Ch. 17Making Lists and Indexes279Pt. VTaking QuarkXPress to the Web289Ch. 18Forget What You've Learned Thus Far291Ch. 19Web Documents: An Overview299Ch. 20Taking Your Pages to the Web325Pt. VIGuru in Training335Ch. 21Customizing QuarkXPress337Ch. 22Details for Cross-Platform Users359Pt. VIIThe Part of Tens373Ch. 23More Than Ten Shortcuts375Ch. 24The Ten Most Common Mistakes387Ch. 25The Ten Best Online Resources393Index399
