To the Nines: A Practical Guide to Horse and Rider Turnout for Dressage, Eventing, and Hunter/Jumper Shows
To the Nines provides an "everything but the riding" guide to competition. Jennifer divulges secrets that most riders only learn by trial and error over years of competition-things like turnout skills, organization and planning, money saving tips, ways to streamline paperwork and keep your horse healthy and contented on the road. An invaluable reference for adult amateur or junior riders in their early years of competition, for pony or 4-H clubs, high school and college equine programs,...
Search in google:
To the Nines provides an "everything but the riding" guide to competition. Jennifer divulges secrets that most riders only learn by trial and error over years of competition-things like turnout skills, organization and planning, money saving tips, ways to streamline paperwork and keep your horse healthy and contented on the road. An invaluable reference for adult amateur or junior riders in their early years of competition, for pony or 4-H clubs, high school and college equine programs, riding instructors and parents of kids preparing to compete. It will also interest experienced competitors who want a good reference to streamline and polish their presentation or who are planning to cross-over disciplines.
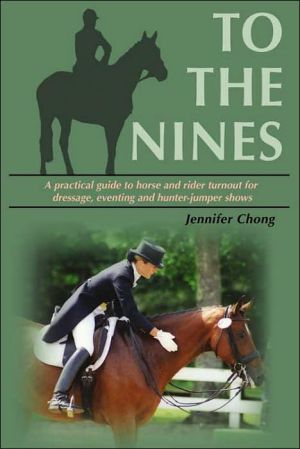
Introduction There always seems to be a million things to do to get a horse and rider ready for a competition. How to manage it all and still arrive on time, in one piece, looking good, and physically and mentally ready to go? I am from a non-horsey family. Since age ten, it has been my responsibility to figure out all the details of preparing myself and my horse for competition. Gradually I learned and refined a set of strategies and techniques to make everything come together, but this took me years of competing and grooming for myself and others at events, at hunter/jumper and dressage shows, and at Pony Club ratings and rallies, not to mention the hours and hours as a working student at event and dressage barns in the United States and Europe. From my wonderful first horse Amelia, a dark bay Appaloosa, through Romi, my Westfalen, to Steel, my Thoroughbred, to Donovan, my young Hanoverian, I have continued to seek new ways to make my preparation faster, easier, and more effective. And then I thought, "Hey, other people are going through this too! Why not write down all the secrets and tricks of the trade I've developed and discovered and share my hard work?" A book like this would have been a great aid to me along the way-I hope you will find it helpful in your own competitive equestrian journey. Have fun! Jennifer Chong\ Breaking in New BootsIf you have new boots, the best way to break them in is to ride in them. Make sure they are completely broken in before you go to a show, or you may be setting yourself up for a miserable time. Even if you usually school in chaps or half chaps, you should school in your new boots long enough to get them broken in. How long depends on the type of leather: softer or thinner leather will break in more quickly than stiffer or thicker leather. I would allow ten to fifteen rides at a minimum. Most boots, dressage boots in particular, should fit very high on the leg, at least as high as your kneecap and sometimes even higher on the outside. This creates a problem for the break-in period: boots will "drop" about an inch and a half, more or less depending on style and quality, but until they do, they will be an inch and a half too tall! If you walk around with your boots on before they are broken in, they will bend behind the knee, which is very uncomfortable for the back of your knee, never mind the unsightly crease that the boots will soon develop. To solve this dilemma, buy a pair of heel risers to insert into the foot of the boot. These will keep the back of the boot from squashing under your knee because they essentially elongate your calf. Once your boots are sufficiently broken down, you can remove them. It is best to only ride (no walking!) in your boots until they have dropped. Also avoid jumping or galloping or any other activity that would require you to use short stirrups until your boots have dropped. Cranking up your stirrups will cause the back of the boot to squash as well because there will be more bend in your knee. Until your boots are somewhat broken in, try to just use them for flatwork.If, after your boots have dropped, they are still stiff and uncomfortable in the foot, try wearing them around the house. Put big socks over the feet if you're concerned about scuffing floors, and walk around in them all the time. But for the reasons mentioned above, make sure they have already dropped at least somewhat. If your feet are getting blistered, buy Dr. Scholl's moleskin and put it over the affected areas. You can also work the boots in your hands, bending and flexing them along the creases and folds that developed naturally from your riding and walking. Let's get it on!\ The easiest way to get boots on and off is with a zipper. If you ride dressage, consider buying boots with zippers on the inside of the calf or having them put in (Euro-American Saddlery does a good job), because then you will skirt the whole boot hook/boot jack issue entirely. Although some field boots are now available with zippers down the back seam, zippers usually aren't used for other disciplines. Make sure your boots aren't too tight when you buy them. If they become too tight, take them to your shoe repair shop and have them stretched for a few days. Adjust the width of your boot trees accordingly to hold this stretch. You can spray the boots with a product such as Fiebings Boot Stretch, and shake baby powder in them or wear nylon stockings so that they'll slide on better. If that's not enough, go back to your shoe man and have him put a small elastic insert on the inside at the top. That may be enough to facilitate getting them on and off. If it isn't, it may be time for new boots. Keep your boot hooks and boot jack where you can find them. I usually keep them in my boots when I'm traveling. Tie the boot hooks together with a length of baling twine, and hang them on a hook. That way you'll be less likely to lose one. Have Plan B.\ Two hoof picks (the plain metal kind, not the plastic ones with brushes on the other side) work well as boot hooks in a pinch. Make sure you keep hoof picks around in your grooming box for such emergencies. (Hoof picks can also make good screwdrivers.) For removing your boots, a helper will work just as well as, and sometimes better than, a boot jack. Sit down on something sturdy so you can hang on without getting dragged out of your seat. Have your helper stand in front of you, back to you, and lean over from the waist. Place one foot between your helper's knees. He should grab the boot around your heel. Put your other foot on the helper's derriere. Push that foot against his bottom while he pulls at the boot he's holding. The combined leverage should make it easy to extricate you from your boot!Pony Club traditionally has not allowed jewelry for safety reasons. Jewelry can easily catch on something and cause problems or, in the event of a fall, result in more serious injuries. Metal, fortunately, will break under stress; items such as friendship bracelets or necklaces made of embroidery thread generally will not, and so these are worse. Rings will give you blisters. Even something as benign as a small stud earring can cause problems. At a horse management judges' conference, a speaker told of a girl who had had a fall and was apparently fine but then subsequently noticed loss of hearing in one ear. Examination of the area showed a small puncture wound from the stud earring, which caused the hearing impairment. In addition to safety concerns, jewelry looks messy while you are riding. Flying necklaces and swinging earrings detract from your overall turnout.If you absolutely must wear jewelry while you ride, make it inconspicuous. Tuck your necklace inside your shirt and hope it stays. Get rid of rings, and either take bracelets off or tuck them away under your cuffs or gloves. The only jewelry visible, if any, should be earrings. These should be tasteful, understated, conservative stud earrings (pearls, diamonds, gold or silver balls, or something of that nature).Some jewelry is easy to remove, but what about jewelry that isn't? Body piercing is becoming more popular, and taking the jewelry out may not always be a viable option-if the pierces are recent, they will close up, and in some locations such as the tongue they'll close even if they were done a while ago. If you do have a tongue ring, keep your mouth closed while competing so as not to distract the judge from your performance. For a pierced nose, wear a nose ring that is small and unobtrusive. The same goes for an eyebrow ring. I knew someone who routinely put a Band-Aid over her eyebrow ring for dressage shows; this may be a good choice, since riding is a rather traditional, conservative sport and many judges may doubt the appropriateness of such things in competition. Nose rings and eyebrow rings can be a safety risk for riders as well, which should be taken into consideration when choosing to have them done. Navel rings and other body piercings are not as problematic since they are under your clothes, which means they are not distracting, nor will they cause a safety problem by catching on something. My hair is currently rather long-it's about waist length. For a while I had it very short, and I have had it at every length in between.For safety reasons, Pony Club forbade the use of metal pins and clips (they could pierce your head easily in a fall), so I am accustomed to doing all lengths of my hair without bobby pins or barrettes. If you feel compelled to use them, that is your choice, but they're not really needed and can be quite uncomfortable under your hat. The crucial factor is that your hair be out of the way and inconspicuous-no wisps, no bits sticking out, and if it's in a bun, no bouncing around. This goes for both men and women. All you long-haired guys out there, you'd better invest in some hairnets and elastic bands. For Hunters \ There is but one appropriate way to fix your hair for hunters, so I would recommend that your hair be about shoulder length, though you can still use this style with longer or shorter depending on its thickness. Of course, if your hair is really short you're exempt. Brush your hair, then pull it into a ponytail at the base of your neck so that the hair partially covers your ears (yes, that is part of "the look"). Lean over and fold the pony tail up over your head, pull a hairnet over all your hair, including your bangs, and put your hat on (while still leaning over) to hold the whole production in place. The disadvantage of this arrangement is that you must leave the hat on or the hair won't stay, even if you've pinned it up. But it is the classic style for the hunter ring, and you may import it to the jumper ring if you so desire. There are two exceptions to this rule: With the new GPA-style hats, juniors may ride with a tiny ponytail (which can only be achieved if the hair is shorter than shoulder-length). Children may go into the pony ring in two pigtails tied with bows. But once these young women have outgrown the ponies (or even before), they should change to the styles above. For Other Disciplines Very short hair\ A hairnet may help to keep bangs out of your face, but most likely even that isn't needed. Consider yourself lucky, and put your hat on and go. Slightly longer hair \ If you can pull your hair into a teeny, tiny ponytail at the base of your neck, do so and enclose everything in a hairnet, including the mini ponytail. If your hair is too short to make a single ponytail, just put the hairnet directly over the hair. You will have a little hair out of the back of your helmet, but it will not be a big deal because it will be contained by the hairnet. Shoulder-length hair\ Put your hair in a ponytail and fold it up over your head. Lean over, capture all your hair in a hairnet, and put your hat on. As with the hunter style, you will have to redo your hair every time you put on or take off your helmet. Currently en vogue in the dressage ring is a bun at the base of your neck, tied with a conservatively colored scrunchie. See long hair instructions. Long hair (mid- or lower-back length)\ Put your hair up in a bun at the nape of your neck, if it will stay, and cover it with a hairnet. A good way to do this is to make a ponytail with one elastic band, and then a bun with a second elastic band. Wrap one hairnet several times around just the bun. Then use a second hairnet to cover your whole head and the bun. You can top this off with a scrunchie wrapped around the bun to look like today's international dressage divas. ...
Acknowledgments viIntroduction viiThe Rider Selection of Attire Schooling Apparel Hats and Helmets Competition Attire Finishing Off the Look A Stick-y Situation: Artificial Aids Boots Jewelry Hair Keeping the Look Fresh Keeping Clean Keeping Cool Ladies Only Barn Clothes The Horse Your Spick-and-Span Horse Grooming Methods of Restraint Bathing Trouble-Shooting and Spot Cleaning Hooves White Markings Clipping Coat Problems Sheath and Udders Chestnuts Show Ring Shine Coat and Mane Treatments Trimming Mane Pulling Braiding Clipping Don't Bug Me! Dealing With Insects Tack Selection of Equipment Quality Style Buying Used Tack Care of Tack Why Care for Tack? Everyday Cleaning Special Occasion Tack Care Complete Cleaning and Conditioning Agh! It's Alive: Neglected Tack Tack Storage Tack Repair, or "My Hero, the Shoe Repair Guy" The Competition Prepare to Compete The Paper Chase Chef D'Equipe Labeling The Traveling Horse Stall and Barn Setup Studs Countdown Ice and Poultice Treatments Laundry Final Words Helpful Lists Competition Checklists Resources About the Author


