Toward a Zero Energy Home: A Complete Guide to Energy Self-Sufficiency at Home
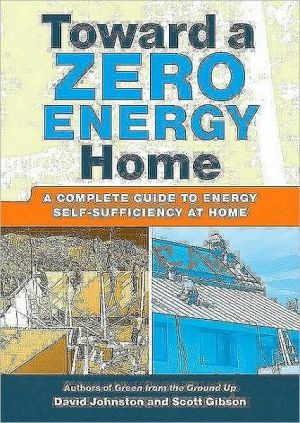
A Zero Energy Home (ZEH) – a home that produces as much energy as it consumes – is an idea whose time has come! Authors David Johnston and Scott Gibson (Green from the Ground Up) explore the design and construction of self-sufficient houses from start to finish. They make the case for a ZEH; cite climate and geographic challenges; describe exactly how to go about building an energy-efficient home; and feature ten houses that were built for zero energy living. With unequaled knowledge and a...
Search in google:
A Zero Energy Home (ZEH) – a home that produces as much energy as it consumes – is an idea whose time has come! Authors David Johnston and Scott Gibson (Green from the Ground Up) explore the design and construction of self-sufficient houses from start to finish. They make the case for a ZEH; cite climate and geographic challenges; describe exactly how to go about building an energy-efficient home; and feature ten houses that were built for zero energy living. With unequaled knowledge and a passion for the subject, the authors walk readers through the process of building and living in a truly green home.
Toward a ZERO ENERGY Home\ A COMPLETE GUIDE TO ENERGY SELF-SUFFICIENCY AT HOME \ \ By David Johnston Scott Gibson \ The Taunton Press\ Copyright © 2010 David Johnston and Scott Gibson\ All right reserved.\ ISBN: 978-1-60085-143-8 \ \ \ Chapter One\ The Building Envelope\ The world of zero energy homes is all about rethinking the envelope, or outer layer, of the building, which includes the roof, walls, and foundation. The challenge is to build an envelope that is as airtight and well insulated as possible so that the energy that comes into the building stays within the envelope, and any inclement weather outside has as little impact on the comfort inside as possible.\ By rethinking how we design and build the envelope to achieve zero energy, all other decisions like heating, ventilation, and air-conditioning (HVAC) and active solar become less expensive. [photo 1ZE-1]\ From a design standpoint, the guiding force in zero energy homes is solar orientation (specifically, Which direction is south?), which is discussed in detail in Chapter 2. If we begin the design process thinking about how we can use the sun to its fullest potential, many other decisions become easier and less expensive. Zero energy homes take advantage of subtle energy flows, such as sunlight turning into heat and how to move that heat inside the building. The building envelope requires very careful design and construction beyond what seemed adequate just a few years ago, and zero energy homes are often 50 percent or more energy efficient than their local energy codes require. [sidebar 1sb1][photo 1ZE-2]\ Building Science 101\ Energy conservation in the building envelope is the initial focus for all the zero energy homes featured in this book. Reducing loads-the amount of fossil energy required to provide comfort year round-by half or more makes installing HVAC equipment much more affordable, as a smaller system is needed. Reducing loads requires getting all the building science right, which means understanding how building science principles work in a house: heat flow (thermodynamics), air flow, convection, the stack effect, controlling air with mechanical ventilation, and water flow (hydrodynamics). The key concept here is durability, so the house lasts as long as buildings built by our forebears. A durable home includes strategies for managing water in all forms (liquid, gas, solid), heat loss, heat gain, ultraviolet light, pests, and natural disasters. [photo 1ZE-3]\ Thermodynamics, or how heat moves (from thermo, meaning "heat," and dynamics, meaning "movement"), is something we are all familiar with, but the basics often escape us when we build. Heat moves from hot to cold-always-even though it may seem that it is the cold that makes us uncomfortable. That is why we call it "heat loss."\ How heat moves\ Heat is transferred in three ways: conduction, convection, and radiation. Conduction is the way heat moves through a solid material. If you put a steel poker into a blazing fire, it isn't long before it gets too hot to handle. We measure conduction with R-values. The higher the R-value, the greater the resistance to heat flow. Insulation has a better resistance to heat flow than wood. Wood resists heat flow better than metal. Common sense tells us that a hot frying pan with a wood handle can be picked up with bare hands but a cast-iron frying pan needs a pot holder. What has this got to do with construction? Building with steel studs, for example, reduces the effective R-value of a wall assembly by 50 percent. [photo 1ZE-4]\ Convection is how heat moves through a gas or liquid. Hot air rises, cold air falls. Putting a hand over the flames of a fire lets us know how rapidly the heat can be transferred. Convection is what makes a chimney work. In a house, dense cold air falls, pushing the hot air upward. The air cools and starts to decline again (this is known as a "convective loop"). In a conventional home, air hits a relatively colder window, falls to the floor pushing the warmer air up in the room, and causes drafts. It is what gives us cold feet in winter.\ Radiation is how hot bodies transfer heat to colder bodies. We are typically most aware of radiation when standing in the sun on hot days, and we naturally move into the shade when we can. Radiation typically follows line of sight; if we can see a fire, we can feel the heat. If we go around a corner, the heat is not as palpable. In terms of a building, west-facing windows in summer are heated by late afternoon sun, which increases the cooling load of the home. [photo 1ZE-5]\ As simple as these laws of physics seem, they can get very complex inside a house when all three are at work simultaneously. By paying attention to conduction, convection, and radiation at every stage of envelope construction, building high-performance houses is more common sense than something exotic.\ Air movement\ Air leakage is a major problem in most houses. A typical house has 2,000 lin. ft. of cracks and gaps that allow air in and out, which can represent up to 50 percent of the heat loss in a building. Often, the older the house, the more air leakage it has. Wherever we join building elements together-bottom plates to subfloor, studs to stud corners, top plates to trusses-there is the potential for air movement through the shell of the building. The designer must be able to identify where this air flow is and how it should be sealed. The air barrier is where outside air is separated from inside air, and there needs to be an air-impermeable separation between the two zones. The air barrier can be toward the inside of the house or toward the outside, depending on climate and selection of building materials.\ Not only does air leakage drain energy from the home but it also often carries moisture into wall cavities or attics, which leads to mold and reduces the lifespan of the house. The tighter the house, the more important it is to deal with both air and moisture movement inside the building. Air and moisture leakage can be blocked by air barriers and vapor retarders. An air barrier stops the movement of air into and through the cavities of the building. A vapor retarder stops the migration of moisture into the walls and ceilings. A vapor retarder may or may not be the same material as the air barrier. For example, closed-cell spray urethane insulation (see p. 000) in rafter spaces provides both an air barrier and a vapor barrier. A wall insulated with fiberglass and wrapped with taped rigid foam insulation has an air barrier on the outside of the sheathing but a vapor retarder on the inside of the wall provided by the drywall and latex paint. [photo 1ZE-6] [sidebar 1sb2]\ To compound the complexity, as warm air rises, it flows through any vertical holes into the attic, a phenomenon known as the chimney or stack effect. If that warm air contains water vapor, it will find its way into the attic and condense on the colder roof sheathing, sometimes actually raining on the ceiling insulation below. Air sealing needs to start during construction so that all holes between floors are caulked and sealed before the insulation is installed. Electrical, plumbing, and HVAC flues are likely suspects in the first stages of air sealing. Conducting a blower-door test before the drywall is installed can help find remaining major air leaks (discussed later in this chapter).\ Water intrusion\ Air movement and water movement are interconnected and must be considered as the building is being designed. For decades, the building industry has separated the two, which has led to numerous building failures. It has always been the job of builders to keep water out of the house, and typically we depend on our roofer to make sure the house doesn't leak. But that is dealing only with water, not water vapor or, in extreme conditions, ice. We have to take all three into account to ensure the long life and durability of the house. [photo 1ZE-7]\ Similar to heat, water always flows from higher concentrations to lower concentrations and from warm to cold. If it is more humid inside a house than outside, the pressure will move water vapor through the envelope to the outside. In hot, humid climates with high cooling loads, the pressure will be reversed. This is where air movement and water movement come together. The water vapor is carried in the air, and wherever air can move so can water. To keep moisture out of the wall cavities, it is critical to define the location of the air barrier. [photo 1ZE-8]\ Water vapor control is very climate specific and is determined by the combination of various products (paint, drywall, insulation type, sheathing, drainage plane, and siding). Because air flow is dictated by both temperature and pressure, and moisture is driven by humidity (water moves from wet to dry), vapor retarders in cold climates during winter should be toward the inside of the home. In hot, humid climates the vapor pressure is from the outside in, thus the vapor retarder should be toward the outside. In either case, the wall cavity, if it is able to absorb moisture, wants to dry toward the opposite side of the vapor retarder. Complicated enough? [photo 1ZE-9]\ Water movement from the outside of a house to the inside is one of the major causes of building failure. While a house might be sealed well when originally constructed, over time, building elements can deteriorate. For example, adhesive flashing around windows and doors may work well for the first few years, but eventually adhesion fails, creating pathways for water to creep around the flashing and into the framing. Mechanical flashing, or ensuring that each layer of housewrap correctly laps over the previous layer, is especially important above doors and windows. Flashing and housewrap should always work together and be lapped from the bottom up, just as roof shingles always lap over each other. Manufacturers of housewraps and window flashings provide detailed installation information, yet most windows are still installed incorrectly.\ Learning from the Passive House Movement\ The idea of a super-insulated "passive house" is a well-thought-out approach to building a zero energy home. The Passivehaus concept was developed in Germany in 1990 based on passive solar research conducted in the 1970s by the U.S. Department of Energy (see Chapter 2). Good passive solar design can reduce the thermal load of a building by 90 percent, primarily through super-insulation, an airtight envelope, good windows, and heat-recovery ventilation. Most of the thermal comfort is provided by passive solar heat, the waste heat from electrical equipment, and people's daily indoor activities. The rest of the heat is often provided by small electric-resistance heaters. Today there are thousands of passive houses across Europe. [sidebar 1sb3, with photo 1ZE-11]\ Passive house principles\ When considering building a zero energy home, passive house standards actually provide a better place to start than local energy codes. They provide an almost ideal set of criteria against which to gauge how close to zero energy you want your house to be.\ Using modeling software\ Modeling a zero energy house is a critical first step and makes up about half the work in getting the results in actual performance. It is a lot easier to correct mistakes on a computer than it is on the job site. Software modeling allows the design team to test a variety of assumptions concerning how much insulation is needed, how passive solar will be used to reduce heating requirements, and how much active solar to add at the end to make up the rest of the home's need for energy.\ The Passive House Planning Package (PHPP) software is recommended by the Passive House Institute since it is designed for very low energy envelopes. The software conducts energy calculations for the entire house, taking into account orientation, house size, location of windows and overhangs, insulation levels, air tightness, and natural and mechanical ventilation. The PHPP will also factor in solar water heating.\ Many other home energy modeling software programs are also available (see "Getting to Zero" [sidebar 1sb4] at [direction] and the appendix on p. 000). When choosing which software to use, it is important to consider how well the software handles the passive solar component and other solar features. Some software does not take orientation and passive solar gain into account, which can lead to an oversize HVAC system. A final word of caution: Software is a useful tool, but it isn't perfect and can yield erroneous results relative to actual home usage.\ Super-insulate the envelope\ The correct amount of insulation is one of the key aspects to address when tightening up the building envelope. The National Renewable Energy Laboratory (NREL) advocates a simple formula when it comes to insulation: 30-40-50. In colder climates, zero energy homes start with R-30 for floors, R-40 for walls, and R-50 for ceilings/roofs. Farther north, builders are using even higher numbers. Your climate will dictate the absolute R-values necessary to reduce the thermal load to close to zero. Most designers of zero energy homes are increasing insulation to 50 percent or more than their local code requires.\ Eliminate thermal bridges\ The greater the insulation values designed into the home, the more important it is to eliminate thermal bridging. In a typical 2?4 wall with studs at 16 in. on center (o. c.), the heat loss through the studs can reduce the overall wall performance by 15 percent. Over 20 percent of the wall area can actually be wood (at about R-1 per inch). If steel studs are used, the thermal bridging can reduce the effective R-value of the wall by nearly 50 percent. With thicker studs, the thermal bridging numbers are lower, but the losses are still unacceptable. This is why conventional framing should be covered with rigid foam on the exterior to reduce the thermal bridging losses. [photo 1ZE-12][sidebar 1sb5]\ Design for airtight construction\ In the world of contemporary building science, airtight construction is a critical component. In the past, we thought that letting air into the house for ventilation was a good thing. We now know that unintentional air infiltration is not only uncomfortable but also often the cause of mold and moisture problems. Barbara Harwood, a builder from Dallas who has built many low energy homes puts it this way: "There is no such thing as a building that is too tight, just one that is underventilated." In a typical new home today, inside air is exchanged with outside air about once every two hours. This provides plenty of fresh air for occupants but has an energy penalty: As much as 50 percent of the heating or cooling load of the house is lost due to this infiltration/ exfiltration process (unhappy customers know it as "drafts").\ The object in a zero energy design is to make the house so tight that it exchanges air only once every 10 hours or so. We make up the fresh air with mechanical ventilation and heat-recovery ventilators (see Chapter 4) and, in so doing, control airflow. We can place air intakes where we want them and distribute the air in the house where it's needed. Without mechanical ventilation, 0.35 natural air changes per hour (NACH) is as low as most codes will allow you to build. That is about the limit of a conventional new, fiberglass-insulated house. [sidebar 1sb14]\ To get to airtight construction, the building needs to be wrapped with an air-sealing barrier or insulated with spray foam. Building products such as structural insulated panels (SIPs) can also create a very airtight structure. The critical areas to examine for air leaks are where there are penetrations, such as doors, windows, vents, and flues, and where building elements come together. The connectivity from floor to floor is also key, particularly between the top floor and the attic. [sidebar 1sb6]\ Heat-recovery ventilation\ When building an airtight envelope it is necessary to provide mechanical ventilation. Climate extremes will determine what type of ventilation is required. In mild climates with few heating and cooling degree days, passive fresh air intakes linked to an exhaust fan may suffice. These are through-the-wall vents with flaps on the inside that work by drawing in air when an exhaust fan is turned on. Otherwise, the flap seals and keeps air pressure in the house neutral.\ (Continues...)\ \ \ \ \ Excerpted from Toward a ZERO ENERGY Home by David Johnston Scott Gibson Copyright © 2010 by David Johnston and Scott Gibson. Excerpted by permission.\ All rights reserved. No part of this excerpt may be reproduced or reprinted without permission in writing from the publisher.\ Excerpts are provided by Dial-A-Book Inc. solely for the personal use of visitors to this web site. \ \
Introduction: The Case for Zero Energy Houses 21 The Building Envelope 10Building Science 101 11Learning from the Passive House Movement 18The Diversity of Framing Practices 26Attic and Roofing Systems 31Insulation Choices and Strategies 35Testing the Building 36Putting It Alt Together 41Case Study: High Heat 42Case Study: A Butterfly Home in the City 50Case Study: Outside-in Retrofit 582 Passive Solar Design 64Passive Solar in the 1970s 69The Design Process 71Choosing Glazing 73Thermal Mass 74Solar Shading 77Principles of Passive Solar Design 78Case Study: PassivHaus Retrofit 82Case Study: Bringing 1887 into the 21st Century 88Case Study: Target Zero House in Taos 963 Renewable Energy 102From Sunlight Alone, Clean Electricity 104Harnessing the Power of the Wind 118Making Hot Water with the Sun 126Sizing a Renewable Energy System 134Look at All the Renewable Energy Options 136Case Study: The Good Life in Vermont 138Case Study: The Next West House 146Case Study: High-End Lakeside Retrofit 1544 Heating, Cooling, and Ventilation 164Options for Heat 168Heat Pumps Provide Both Heating and Cooling 168Electric-Resistance Heat Can Work in a Net Zero House 176Wood and Other Forms of Biomass 180Getting Heat Around the House 183Keeping the House Cool 186Ventilation for a Healthy House 188Heating Water 191Case Study: A Solar Jewel in Boulder 194Case Study: Reinventing the High Rise 202Case Study: All-Electric House: $1.16 a Day 2105 Living a Zero Energy Life 218It's Just Not Low Energy Bills 221Gaining a New Appreciation for Energy 222Mechanical Systems are More Complicated 225Fighting the Perceptions of High Cost 226Marketing the Zero Energy House 228A House That's Also a Classroom 232Case Study: Affordable Housing Meets Zero Energy 233Appendix 1 Energy Modeling Software 242Appendix 2 Air Changes per Hour: 50 Pascals of Pressure 243Resources 244Credits 246Index 248


