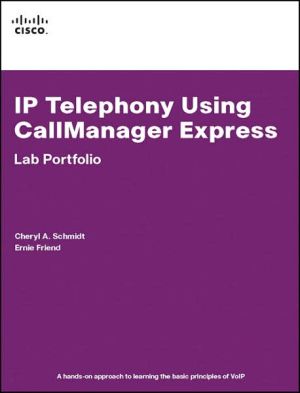
IP Telephony Using CallManager Express-Lab Portfolio
IP Telephony Using CallManager Express\ Lab Portfolio\ Cheryl A. Schmidt\ Ernie Friend\ IP Telephony Using CallManager Express Lab Portfolio provides a hands-on approach to learning the basic principles of voice over IP (VoIP) to build a voice-enabled network for the small to medium-sized business.\ As you work through the 51 labs in the book, you learn how to deploy a basic phone system using a CallManager Express-capable router. You install, configure, and customize Cisco® IP Phones to work...
Search in google:
IP Telephony Using CallManager ExpressLab PortfolioCheryl A. SchmidtErnie FriendIP Telephony Using CallManager Express Lab Portfolio provides a hands-on approach to learning the basic principles of voice over IP (VoIP) to build a voice-enabled network for the small to medium-sized business.As you work through the 51 labs in the book, you learn how to deploy a basic phone system using a CallManager Express-capable router. You install, configure, and customize Cisco® IP Phones to work in an IP Telephony environment as well as with traditional analog telephony devices.Each chapter begins with an explanation of the converging technology used within that chapter’s labs and, where necessary, includes a refresher on routing and switching topics so that you can properly set up the labs. The collection of labs features clear objectives, equipment needs, alternative methods, and probing questions. Additionally, the book includes a command reference as one of the six supplemental appendixes.All the material has been written and tested with students in a live classroom environment: Labs enable you to deploy a progressively more layered VoIP environment as you complete the labs in each chapter. Paper exercises help you work through and reinforce your understanding of fundamental topics such as dial plans, IP addressing, and dial peers. Case Study labs present the material in scenarios that combine the methods learned in the previous chapters so that you apply your knowledge to a specific scenario or task. Pulling together various concepts simulates the real-world environment where things are rarely assigned one step at a time.The Lab Portfolio can be used as a supplement to any textbook used to teach CVoice or CallManager Express. It can also be used as a standalone resource for anyone wanting to learn the basics of IP Telephony.After completing all the exercises and hands-on labs in this book, you will know how VoIP works and be well prepared to configure the technology in a small to medium-sized business.Cheryl A. Schmidt is a full-time faculty member in the Network Engineering Technology department at Florida Community College at Jacksonville (FCCJ).She has a master's degree in computer and information resource management. For the past 10 years, Cheryl has been teaching courses such as computer repair, CCNA®, CCNP,® VoIP, QoS, and wireless.Ernie Friend is the Director of Academic Systems at Florida Community College at Jacksonville (FCCJ) Florida. He manages the Network Engineering Technology department at FCCJ and had previously managed the college’s network and computer infrastructure. He has been managing computer and networking departments for more than 14 years at the college and continues to explore and teach the latest networking technologies.Use this Lab Portfolio with:Cisco IP Communications Express: CallManager Express with Cisco Unity ExpressISBN: 1-58705-180-XVoice over IP Fundamentals, Second EditionISBN: 1-58705-257-1This book is part of the Networking Technology Series from Cisco Press®, the only authorized publisher for Cisco Systems®.Category: IP TelephonyCovers: CallManager Express111606
Chapter 1 Traditional Phone and IP Telephony Overview of Traditional Phone NetworksUnderstanding Basic Analog TechnologiesMore ConnectivityLab 1-1: VoIP PortsLab 1-2: IP Telephony TermsLab 1-3: Installing Cisco CallManager Express (CME)Task 1: Configure the TFTP ServerTask 2: Update and Install the Cisco CME IOSChapter 2 Router, Integrated Switch, and IP Phone Basic Configuration Overview of VoIP Basic ConfigurationBasic Requirements for VoIP ImplementationVLAN ReviewIP Phone Connectivity OptionsSpecial Commands for the LabsLab 2-1: Connecting the IP Phone to a SwitchTask 1: Understand the Power Capability of SwitchesTask 2: Cable the IP Phone to an Inline Power Switch/Switch ModuleTask 3: Cable the IP Phone to a Noninline Power Switch/Switch ModuleLab 2-2: Resetting a Cisco IP PhoneTask 1: Provide Power to the SwitchTask 2: Reset the Cisco IP PhoneLab 2-3: IP Addressing with IP TelephonyLab 2-4: Configuring a Cisco CallManager Express-Capable Router and anIntegrated SwitchTask 1: Select a Pod NumberTask 2: Erase the Configuration from the Router and Switch ModuleTask 3: Perform Basic Router ConfigurationTask 4: Configure the Router Switch Module PortsTask 5: Verify VLAN ConfigurationTask 6: Save the Router ConfigurationLab 2-5: Configuring a Cisco CallManager Express-Capable Router with anExternal SwitchTask 1: Select a Pod NumberTask 2: Erase the Router ConfigurationTask 3: Assign a Router Name and CableTask 4: Configure Layer 3 TrunkingTask 5: Configure the Routing ProtocolTask 6: Erase the SwitchTask 7: Assign a Switch NameTask 8: Configure Layer 3 Access to the SwitchTask 9: Enable the Management VLANTask 10: Configure a Switch Port as a Trunk PortTask 11: Create VLANs on the SwitchTask 12: Test Connectivity Across the TrunkTask 13: Configure Switch Ports for IP PhonesChapter 3 Managing and Configuring Cisco VoIP Devices IP Telephony IP AddressesDHCP Option 150PC IP Addressingephone-dnCisco Network AssistantLab 3-1: Configuring VoIP Using the telephony-service setup ProgramTask 1: Configure the Cisco IP Phones Using the telephony-service setup CommandTask 2: Verify Connectivity Between the Cisco IP PhonesTask 3: Connect a PC to the Cisco IP Phone Port, and Verify the ConfigurationTask 4: Erase and Reboot the RouterLab 3-2: Manually Configuring a CME Router for VoIP PhonesTask 1: Configure a DHCP Pool for Cisco IP PhonesTask 2: Verify and Optionally Load the Cisco Firmware FileTask 3: Perform Basic Router Configuration for a Cisco IP PhoneTask 4: Verify Cisco IP Phone RegistrationTask 5: Add Configuration for a Second Cisco IP PhoneLab 3-3: Connecting a Second IP Phone Using the auto assign CommandTask 1: Add a Second Cisco IP Phone by Using the auto assign CommandTask 2: Connect and Verify the Phone ConfigurationLab 3-4: Using the Quick Configuration Tool to Set Up Cisco CMETask 1: Install the QCT SoftwareTask 2: Configure the QCT SoftwareLab 3-5: Using Cisco Network AssistantTask 1: Preconfigure the Router and Switch/Switch ModuleTask 2: Install the Cisco Network Assistant SoftwareTask 3: Configure the Cisco Network Assistant SoftwareChapter 4 Dial Plans and Dial Peers Types of Dial PeersDestination PatternsPorts and Session TargetsCall LegsLab 4-1: Single-Router Dial Peer ExerciseLab 4-2: Single-Router Wildcard Dial Peer ExerciseDestination Pattern Wildcard DigitsLab 4-3: Two-Router Wildcard Dial Peer ExerciseLab 4-4: Four-Router Wildcard Dial Peer ExerciseLab 4-5: Complex Two-Router Wildcard Dial Peer ExerciseChapter 5 Configuring VoIP Ports FXS and FXO InterfacesT1 InterfacesLab 5-1: Configuring FXS ConnectivityTask 1: Verify FXS CapabilityTask 2: Connect and Configure the Analog PhoneLab 5-2: Configuring FX0 ConnectivityTask 1: Configure the FXO InterfaceTask 2: Configure the Dial PeerTask 3: Verify FXO ConnectivityLab 5-3: Configuring T1/PRI ConnectivityTask 1: Verify That the Router Has T1 CapabilityTask 2: Configure the ISDN Switch TypeTask 3: Configure the T1 ControllerTask 4: Configure the Dial PeersTask 5: Test ConnectivityChapter 6 Digit Manipulation Digit Stripping and PrefixesForward DigitsNumber ExpansionTranslation RulesUsing the translation-rule CommandNumber SliceLab 6-1: Translation Rule Exercise 1Task 1: Complete Table 6-6Lab 6-2: Translation Rule Exercise 2Task 1: Complete Table 6-7Task 2: Verify the Translation Rules in Table 6-7Task 3: Complete Table 6-8Task 4: Verify the Translation Rules in Table 6-8Lab 6-3: Configure Translation Rules for the Help DeskTask 1: Verify Phone ConnectivityTask 2: Configure Translation Rules for the Help DeskLab 6-4: Configure Translation Rules for 1-800 NumbersTask 1: Verify Phone ConnectivityTask 2: Configure and Test the Second FXS PortTask 3: Configure a Translation Rule for 1-800 NumbersLab 6-5: Testing and Troubleshooting Translation RulesTask 1: Verify Phone ConnectivityTask 2: Test Translation RulesTask 3: Debug Translation RulesChapter 7 Configuring Inter-Pod Connectivity Digit ManipulationClass of Restriction (COR)Lab 7-1: Configuring T1/PRI Connectivity Between Two PodsTask 1: Verify Connectivity Between PhonesTask 2: Verify Inter-Router ConnectivityTask 3: Verify Cisco IP Phone Connectivity Between SitesLab 7-2: Configuring CORTask 1: Configure COR ParametersTask 2: Apply the COR with a Dial Peer or Directory NumberTask 3: Test the CORLab 7-3: Configuring Inter-Pod Serial ConnectivityTask 1: Configure Serial Interface ConnectivityTask 2: Configure the Dial PeerTask 3: Test the ConfigurationTask 4: Reconfigure the CodecChapter 8 GUI and IOS Intermediate Administration Web AdministratorsPhone User Accountsephone Versus ephone-dnBlind Transfers and Consultative TransfersCall ParkSystem MessageIntercom FeaturePaging GroupModifying the Customer Administrator Account withLab 8-1: Configure the GUI for the System AdministratorTask 1: Install the GUI Cisco IOS FilesTask 2: Configure the GUI InterfaceTask 3: Configure a Speed DialTask 4: Configure the System TimeLab 8-2: Configure the GUI for the Customer AdministratorTask 1: Create a Customer GUI AdministratorTask 2: Review Changes to the Router ConfigurationTask 3: Test the New AccountTask 4: Optionally, Modify the New AccountTask 5: Optionally, Test the Modified AccountLab 8-3: Configure the GUI for the Phone UserTask 1: Create a Phone User AccountTask 2: Manage the IP Phone Using a Phone User AccountLab 8-4: Configure Call Transfer and Call ForwardTask 1: Configure Call Transfer and Call ForwardTask 2: Examine Call Forward FeaturesLab 8-5: Configure and Use Call ParkTask 1: Configure the CME Router for Call ParkTask 2: Test the Call Park FeatureLab 8-6: Customize the IP PhoneTask 1: Customize the IP Phone DisplayTask 2: Reset and Verify the Phone DisplayTask 3: Perform More GUI CustomizationLab 8-7: Configure the Intercom FeatureTask 1: Configure the IntercomTask 2: Test the Intercom ConfigurationLab 8-8: Configure a Dialable IntercomTask 1: Configure the Dialable IntercomTask 2: Test the Dialable IntercomLab 8-9: Configure Paging GroupsTask 1: Configure the Paging GroupsTask 2: Test the Paging GroupsTask 3: Configure a Combined Paging GroupTask 4: Test the Combined Paging GroupChapter 9 H.323 Intersite VoIPH.323MGCPSIPA More In-Depth Look at H.323Gatekeeper and GatewayE.164 Number RegistrationH.323 Gatekeeper ConfigurationH.323 Gateway ConfigurationLab 9-1: Simple H.323 Between Two PodsTask 1: Verify ConnectivityTask 2: Configure and Test the Routers for Serial ConnectivityTask 3: Configure a Loopback Interface and RoutingTask 4: Configure the H.323 Dial PeersTask 5: Test the Dial PeersLab 9-2: H.323 with a Gatekeeper and Analog PhonesTask 1: Verify the IOS VersionTask 2: Configure Inter-Router ConnectivityTask 3: Configure the GatekeeperTask 4: Configure the Gateway Portion of the GatekeeperTask 5: Configure the Gateway RouterTask 6: Configure the FXS Dial PeersTask 7: Configure the VoIP Dial PeersTask 8: Test H.323 ConnectivityLab 9-3: H.323 with Analog and IP PhonesTask 1: Verify Analog Phone ConnectivityTask 2: Configure IP Phone Connectivity on the GatekeeperTask 3: Configure IP Phone Connectivity on the GatewayTask 4: Configure and Test the Gatekeeper for IP ConnectivityTask 5: Manually Register the IP Phone with the GatekeeperChapter 10 VoIP Quality of Service and Security Overview of VoIP Quality of ServiceSwitch Quality of ServiceNBAROverview of VoIP SecurityCommon Router Security TechniquesVoIP Router Security TechniquesLab 10-1: Configuring AutoQoS on a Router Using an Integrated SwitchModuleTask 1: Verify Default QoS Switch Module SettingsTask 2: Enable AutoQoSTask 3: Verify AutoQoS SettingsTask 4: Modify and Verify AutoQoS ParametersTask 5: Remove AutoQoSLab 10-2: Configuring AutoQoS on a Router and External 3550+ SwitchTask 1: Verify Default QoS Switch Module SettingsTask 2: Enable AutoQoS on the RouterTask 3: Verify AutoQoS SettingsTask 4: Enable AutoQoS on the SwitchTask 5: Modify and Verify AutoQoS ParametersTask 6: Remove AutoQoSLab 10-3: Using NBARTask 1: Verify IP Phone ConnectivityTask 2: Enable NBARTask 3: Verify the Effects of NBARTask 4: Remove NBARLab 10-4: VoIP Security MeasuresTask 1: Verify Phone, PC, and Router ConnectivityTask 2: Restrict Phone RegistrationTask 3: Protect and Test GUI ManagementTask 4: Configure IP Phone Activity MonitoringTask 5: Prevent Toll FraudChapter 11 Unity Express Overview of Unity Express ConfigurationVoice MailSIPMWIBusiness Hours ScheduleNight Service BellLab 11-1: Accessing Unity Express for the First TimeTask 1: Verify Connectivity and Installed FilesTask 2: Configure the Router for Unity ExpressTask 3: Choose Options in the Initial Configuration DialogTask 4: Configure Basic Unity Express ComponentsTask 5: Test Voice MailLab 11-2: Configuring Unity Express from a Web InterfaceTask 1: Verify Phone and PC ConnectivityTask 2: Prepare the Router and Unity Express for Web AccessTask 3: Configure Voice Mail Using the Web InterfaceTask 4: Test Voice MailTask 5: Configure and Test the MWILab 11-3: Configuring Business Hours and Night Service Bell FeaturesTask 1: Verify IP Phone and PC ConnectivityTask 2: Configure the Business Hours SettingsTask 3: Verify the Business Hours SettingsTask 4: Configure the Night Service BellTask 5: Test the Night Service BellChapter 12 Case Studies Case Study 12-1: Configuring Cisco CallManager Express Connectivity BetweenTwo PodsTask 1: Create a New IP Addressing SchemeTask 2: Create a New Five-Digit Dial PlanTask 3: Build and Configure a Two-Router Voice Network with CMETask 4: Configure an Analog Phone on Each RouterTask 5: Verify IP Phone and Analog Phone ConnectivityCase Study 12-2: Elementary School (Multiple CMEs)Case Study 12-3: IT Company1765_fm.qxd 11/15/06 6:14 PM Page xAppendix A Reference Tables Appendix B Command Reference Appendix C Installing a Unity Express AIM in a 2811 Router Appendix D Configuring the Adtran Dial Plan Appendix E Resetting 7970 Cisco IP Phones Appendix F Configuring Cisco IP Communicator 1587131765TOC111606
