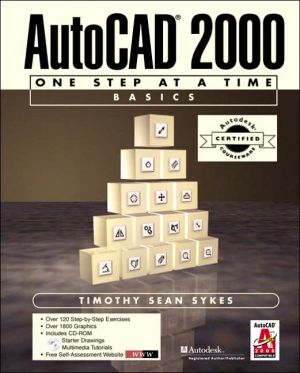
ACC Version-AutoCAD(R) 2000 : One Step at a Time-Basics
A text designed for novice AutoCAD users that is ideal for either classroom use or independent study. This book takes a three-pronged approach to teaching AutoCAD by integrating text, CD-ROM, and web-based support to create a complete learning system.\ Book — Includes 20 AutoCAD lessons designed to bring you fully up to speed with 2-D drawing. Lessons are clearly marked for purpose and content, and provide hands-on, step-by-step instructions to help the student master the task. All...
Search in google:
A text designed for novice AutoCAD users that is ideal for either classroom use or independent study. This book takes a three-pronged approach to teaching AutoCAD by integrating text, CD-ROM, and web-based support to create a complete learning system. Book — Includes 20 AutoCAD lessons designed to bring you fully up to speed with 2-D drawing. Lessons are clearly marked for purpose and content, and provide hands-on, step-by-step instructions to help the student master the task. All instructions come in an easy to follow 3 column format labeled Do This! that clearly presents the task at hand. Lessons contain tips, tricks, projects, and quizzes developed by the author through years of experience as a designer and CAD guru. CD — This CD keeps on providing instruction when you have left the classroom, or are studying on your own. 25 drawing tasks are captured as multimedia presentations for your review. Each lesson is keyed to a specific section in the text marked with a CD icon. When you review these lessons on your computer, you will see a drawing being created right on screen using the steps shown in the text. As the AutoCAD cursor moves across the screen, a voice accompanies the movements and provides audio instruction and reinforcement. In addition, the CD contains easy to find files of all the drawing lessons in the book. Worldwide Web — This text has an accompanying website that offers a self-assessment tool to test your understanding of important concepts — http://www.prenhall.com/sykes . It contains sets of questions keyed to approximately half the lessons in the text that test your understanding of key concepts. Take these quizzes online aspractice exams, and you will receive immediate feedback on your progress.
Preface Introduction\ AutoCAD 2000 is a great software program, and in writing this text, I have tried to make learning AutoCAD simple and fun to learn. My system of step-by-step instructions, supported by reference material, creates a hands-on approach to which you can refer over and over again. Each lesson includes: explanations of command options, worked examples of each command, and where appropriate, tips on using speck techniques in industry. I've also worked with my publisher to support this book with the latest in technology—a multimedia tutorial CD-ROM with 25 AutoCAD tutorials, and a web site that provides a tool for self-assessment. AutoCAD is a challenging yet powerful program. We developed this package to provide all the support you need to master it. Integrated, Multimedia Learning System\ When you use this book, you are not just using a single text, but an integrated multimedia learning system made up of 3 parts:\ 1. Book—20 AutoCAD lessons designed to bring you fully up to speed with 2-D drawing, and a first lesson in 3-D. Lessons are clearly marked as to purpose and content, and provide hands-on, step-by-step instructions to help the student master the task. Lessons contain tips and tricks developed through years of experience as a designer and CAD guru. Each lesson concludes with some extra steps for learning enhancement, several projects from a variety of disciplines and at various levels of mastery, and a list of review questions to validate student accomplishment. All lessons are covered in a clear, friendly and encouraging writing style to set the student at ease.\ 2.CD-ROMThis CD-ROM keeps on providing instruction when you have left the classroom, or are studying on your own. Here, you will find 25 drawing exercises captured as multimedia tutorials for your review. Each tutorial is keyed to a specific "Do This" exercise in the text with a CD-ROM icon. Review these tutorials on your computer and you will see a drawing being created right on screen using the steps shown in the text. As the AutoCAD cursor moves across the screen, a voice accompanies the movements and provides audio instruction and reinforcement. Further, the CD-ROM contains easy to find files of all the drawing lessons in the book. I hope this CD-ROM truly extends your ability to learn AutoCAD and study on your own when an instructor is not available.\ 3. World Wide Web—This text makes use of the Web as a self-assessment tool to test your understanding of important concepts at its own website http://www.prenhall.com/sykes/. It contains sets of questions keyed to approximately half the "Do This" exercises in the text that test your understanding of key concepts. "Do This" exercises that have online quiz material are marked with a web icon. Take these quizzes on-line as practice exams, and you will receive immediate feedback to your progress. Instructors can ask students to take these on-line quizzes and submit their results electronically, allowing instructors to easily track a student's progress. Professors may also use the syllabus builder feature of this web page to quickly prepare their own on-line syllabus. Why I Wrote This Book\ Some years ago I took my first AutoCAD course. I had been drafting for almost ten years at the time, but I saw that the drawing board would eventually give way to the computer. So I dug deep into the shallow recesses of my wallet and came up with the $300 I needed to take the course. A year or so later, still on the board, I was designing piping systems for one of the big petrochemical companies in Houston. There was one computer on the job, but nobody knew how to use it. I dedicated my lunches and evenings to exploring that old machine—often messing it up badly and having to call the computer support folks to come fix it.\ After a few months of this, my immediate supervisor was transferred to an AutoCAD project. He was somewhat lost in the computer world and I was the only one he knew who could turn one on. So he asked for me to follow him. I was excited by the prospect—until I learned that I was to be in charge of five CAD stations on the new project! Then I was a bit nervous (okay, terrified). I did what any closet teacher would do—I went right out and bought a book! For the next several weeks, I managed to stay exactly twelve hours ahead of the rest of my crew. That is, (it seemed miraculous) what I read one evening was what I was asked about the next day! So my reputation as a guru was established, simply because I was the guy who bought (and read) a book.\ Why this book? My hope in writing this book has been to create something that is friendly rather than egghead academic. My intent is to teach my students (and readers) how to make a living using AutoCAD—essentially to answer the questions that I faced that first year as a guru and in the years since as an instructor. I will not cover every nook and cranny of this marvelous tool; but let's face it, it's a beginner's book—not an encyclopedia. Follow the book carefully and you can function as an apprentice CAD operator anywhere. Continue with AutoCAD: One Step at a Time—Advanced upon completing this book, and you will be well on your way to becoming an advanced user in the 3-dimensional drawing world! Pedagogy\ Each lesson follows that old saying I learned back in "teacher school": tell 'em what you're gonna tell 'em; tell 'em; tell 'em what you told 'em. So we begin each lesson with a set of goals stated simply as: Following this lesson, you will. This page gives you some idea of what you will cover in the lesson. Next, we cover the material. This occurs in three steps.\ 1. First we discuss a topic—Generally a command or procedure. This discussion includes the purpose of the command or procedure and a sample and explanation of either the command sequence or the dialog box. Refer to this section to answer questions concerning what a command or option does.\ 2. Second we have a guided exercise called Do This:—These exercises act as an instructor telling you what to do one step at a time. Perhaps the most important feature of the text is its step-by-step approach. I divide more than 120 Do This: exercises into three columns in which I explain the task, show the task being done and show any tools that might make the task easier. I even show how the results of the task should appear on the student's computer screen. The exercises are generally divided into three columns. The Steps column tells you what to do. The Command Sequence column shows you what to do. The Tools column generally gives you a button or drop-down box option to the keyboard approach shown in the Command Sequence column.\ 3. Last we have an independent project (or several)—This occurs in the Exercises section at the end of each lesson. Here you find a project that you must do on your own. Setup information will be provided, but you must refer to previous lessons as needed to complete the project independently. Throughout the lesson, you will find colored inserts that provide additional information or tricks to help in your understanding of the topic.\ After covering the material, there is an Extra Steps section in each lesson. These are full of added features, tidbits of knowledge, or suggestions for further study.\ The Tell 'em what you told'em part (found in the What Have We Learned? section) does just that. In this section, I also try to give you some idea of what will come next. I finish each lesson with some review questions to reinforce what we have covered, and a selection of exercises from various industries.\ This approach benefits each student by acting as an individualized instructor—sitting at the student's elbow and walking him or her through the task one-step-at-a-time. It benefits the instructor by freeing him from instructional chores to deal with problems or to reinforce student accomplishment. Style Notes\ I have followed several conventions in creating this text. Understanding them will make it easier to follow:\ \ Throughout the text: \ \ I use italics for emphasis and to indicate the names of files\ I use bold to indicate AutoCAD prompts, buttons and names of Buttons, system variables, and dialog box tabs\ I use bold and italics to indicate AutoCAD command names, hotkeys, and user input\ I CAPITALIZE names of dialog boxes and pull-down menus\ I use bullets and graduated indention to organize explanations of command options\ \ \ \ Art \ I wrote this text to be the most visual book on the market. Whenever possible, I tried to illustrate how to create drawings through generous use of detailed screen shots, and actual drawings. In teaching, I have found that my students really appreciate a visual approach to learning. This text contains over 1800 graphics! Advanced Book\ Once you have completed this text, you can learn more about AutoCAD's advanced features using AutoCAD 2000: One Step at A Time-Advanced. An outline for this book is as follows.\ Part 1: Drawing Display and Arrangement\ \ Lesson 1: Space for a New Beginning\ Setting up viewports and Paper Space.\ Lesson 2: After the Setup\ Using Paper Space-dimensioning, layers, text and editing\ Part 2: Welcome to the Third Dimension\ Lesson 3: "Z" Basics\ Introduction to the Z-axis, the UCS, three-dimensional coordinate entry, three-dimensional setup and viewing\ Lesson 4: More of Z Basics\ UCS vs. WCs, working planes, advanced viewing techniques\ Part 3: Simple Modeling\ Lesson 5: Wireframes and Surface Modeling\ Introduction to three-dimensional drafting, 3d polylines, point projection, surfaces/faces\ Lesson 6: Predefined Surface Models\ Using AutoCAD's predefined surface modeling tools-boxes, wedges, pyramids, etc.\ Lesson 7: Complex Surface Models\ Creating your own surface model shapes\ Part 4: Simple Model Editing\ Lesson 5: Z-Space Editing\ Three-dimensional uses for familiar (two-dimensional) tools, tools designed for Z-Space\ Part 5: Advanced Modeling\ Lesson 9: Solid Modeling Building Blocks\ Using predefined solid modeling tools, creating your own solid modeling shapes\ Lesson 10: Composite Solids\ Turning building blocks into solid objects, shaping solid objects\ Lesson 11: Editing 30 Solids\ Tools designed for modifying 3D Solids\ Lesson 12: Three-Dimensional Blocks and Three-Dimensional Plotting Tools\ Creating and inserting three-dimensional blocks, solid plotting tools\ Part 6: Rendering\ Lesson 13: Is It Real or Is It Rendered?\ Creating photographic quality images from three-dimensional drawings\ Part 7: AutoCAD Interfaces with Drawings, Images, Networks, and Other Programs\ Lesson 14: Externally Referenced Drawings\ Using one drawing in another without increasing the size of either\ Lesson 15: Graphic Files and AutoCAD\ Inserting, using, and manipulating other graphics images into AutoCAD drawing files\ Lesson 16: AutoCAD and the Internet\ AutoCAD's use of networking\ Lesson 17: Databases and AutoCAD\ Sharing information between AutoCAD's database and other data base programs such as MS Access Supplements\ Each book comes with its own free CD-ROM that contains multimedia tutorials and drawing files. Students or users may utilize this CD-ROM on single machines, or instructors are free to install it on a network. We are also supporting the text with the Sykes website—http://www.prenhall.com/sykes/, and qualified instructors using this text may order an instructor's solutions disk. To order this disk, either contact your local Prentice Hall sales rep, order online at http://www.prenhall.com, or call 1-800-922-0579. The ISBN for the instructor's CD-ROM is 0-13-085386-0. Bundling options\ To make the cost of purchasing several books for one course more manageable for students, Prentice Hall offers discounts when you purchase this book with several other Prentice Hall textbooks. Discounts range from 10 to 20% off the price of the two books separately. At press time, you may bundle this text for discounts with any core Prentice Hall graphics text by Giesecke, Earle, Lockhart/Johnson, or Sorby You may also bundle this text with the Advanced version when it is published for a discount. To request more specific pricing information, get isbn's for ordering bundles, and learn more about Prentice Hall's offerings in graphics and CAD, either contact your Prentice Hall Sales rep, or go to http://www.prenhall.com/cadgraphics/ For the name and number of your sales representative, please contact Prentice Hall Faculty Services at 1-800-526-0485.
PrefaceCD-ROM SetupPt. 1The Basics1Lesson 1Setup3Lesson 2Drawing Basics: Lines and Coordinates33Lesson 3Putting It on Paper57Lesson 4Drawing Aids87Lesson 5Display Controls and Basic Text125Lesson 6Geometric Shapes (Other Than Lines and Rectangles!)169Pt. 2Beyond the Basics211Lesson 7Adding Flavor to Your Drawing with Layers213Lesson 8Editing Your Drawing: Modification Procedures265Lesson 9More Complex Lines: Polylines (and Light Weight Polylines)313Lesson 10More Editing Tools353Pt. 3Some More Advanced Techniques391Lesson 11Some Useful Drawing Tricks393Lesson 12Guidelines and Splines427Lesson 13Advanced Lines: Multilines467Lesson 14Advanced Text: MText507Lesson 15Basic Dimensioning543Lesson 16Customizing Dimensions589Lesson 17Advanced Modification Techniques621Pt. 4Razzle Dazzle651Lesson 18Hatching and Section Lines653Lesson 19Many as One: Groups and Blocks695Lesson 20Advanced Blocks741Lesson 21Afterword: Getting an Edge783App. ADrawing Scales805App. BFunction Keys and Their Uses806App. CAnswers to Review Questions807App. DMtext Keystrokes813App. EDimension Variables815Index819

![Mastering AutoCAD 2010 and AutoCAD LT 2010 [With DVD ROM] Mastering AutoCAD 2010 and AutoCAD LT 2010 [With DVD ROM]](/application/data/covers/60/32/9780470466032.jpg)

